
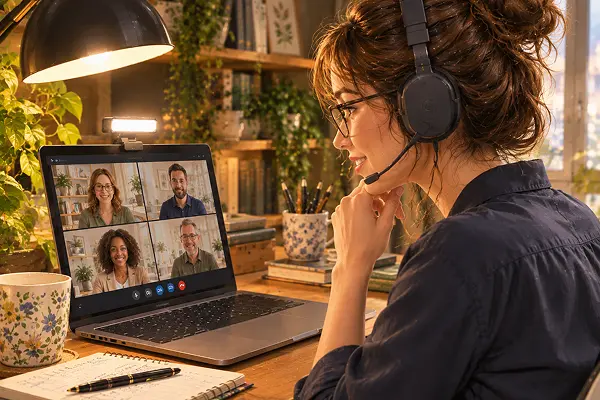
If you want to improve video call quality from a small home office, small details in your setup can make a massive difference. The very first time an important corporate client mentioned that I was slightly difficult to hear during a project briefing, I casually assumed it was just a temporary glitch with their internet connection. The second time it happened, I quickly checked my internal software microphone settings. The third time, however, I finally had to admit that the basic, built-in microphone on a three-year-old laptop, positioned inside a small rental room with hard bare walls and inadequate overhead lighting, was producing poor audio and video quality that was making a highly unprofessional impression without me even realising it.
In the modern remote work landscape, digital video presentation matters far more than most professionals acknowledge. It directly impacts how your competence, authority, and engagement are perceived by colleagues and stakeholders. Fortunately, transforming your virtual presence from grainy and muffled to crisp and professional does not require a Hollywood budget or a dedicated studio room. By understanding a few basic principles of home office design, you can improve video call quality significantly while keeping your expenses remarkably low.
The Four Core Variables of Virtual Presentation
Achieving exceptional virtual communication quality relies on balancing four fundamental elements: clear audio, intentional lighting, a curated background, and network connection stability. Most remote workers mistakenly focus all their attention on buying an expensive external webcam while entirely ignoring the other three components, which are often significantly more impactful to the overall viewer experience. Let us break down how to optimize each variable using affordable, high-utility equipment.
Audio: The Absolute Priority in Remote Communication
If you can only afford to upgrade one single element of your workstation this month, make it your microphone. Research on digital video communication consistently demonstrates that poor audio quality has a far more negative impact on perceived professional competence than a low-resolution video feed. Audiences will easily tolerate a slightly pixelated or grainy camera view without losing track of the conversation, but they will quickly experience listening fatigue and disengage if your voice requires physical effort to understand.
To fix hard room echoes and muffled laptop sound on a budget, consider these three reliable hardware options:
- Dedicated USB Condenser Microphones: Devices like the Fifine K669B or the classic Blue Snowball iCE provide an astronomical leap in clarity compared to any built-in computer hardware. They plug directly into your laptop, capture a rich, warm vocal tone, and sit neatly on your desk.
- Wired Earphones with Inline Microphones: If you prefer a minimalist look, classic wired earbuds like the Apple EarPods are frequently superior to expensive wireless headphones for voice call clarity. Because the microphone is physically positioned closer to your mouth, it isolates your voice beautifully.
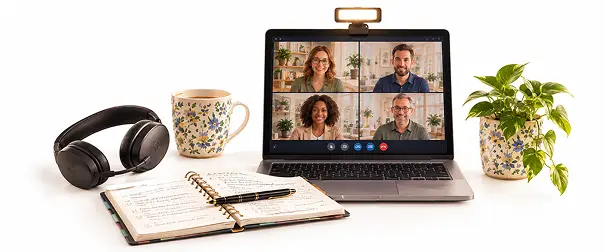
- A Simple Office Headset: Utilizing a dedicated headset naturally positions the microphone element away from your laptop’s internal cooling fans and keyboard clicking noises, ensuring your speech remains clean during active typing.
Lighting: The Design Element Most People Ignore
Good camera lighting needs to come directly from in front of you, positioned at roughly eye level. It should never come from behind you or directly overhead. Sitting with a bright window behind your desk creates a harsh silhouette effect, turning you into a dark shadow. Conversely, strong overhead ceiling lights create unflattering shadows under your eyes and nose.
Natural daylight is always the most beautiful and sustainable choice. If your small office layout allows it, position your desk facing a window so the natural light illuminates your face evenly. If you work in a darker room or host calls late in the evening, a compact desktop ring light, or a adjustable metal desk lamp fitted with a soft white LED bulb positioned right behind your monitor will instantly transform your appearance on camera for a very small investment, easily matching the high-end look of affordable office lighting collections from brands like IKEA.
Background: Curating Your Professional Space
Your physical background tells a story about your work ethic and attention to detail. A tidy, neutral setting reads as sophisticated and organized without requiring you to buy a commercial studio backdrop.
A plain painted wall, a simple bookshelf with neatly organized books, or a small corner styled with one or two low-light indoor plants all work beautifully to create a calm, professional atmosphere. Visible clutter, unmade beds, or domestic household chaos in the background create visual distractions that most remote workers would prefer to avoid. Creating order here is essential, much like learning how to design a home office that separates work and rest in a single room.
If your small room layout forces you to use virtual software backgrounds, consider investing in a collapsible green screen that attaches to the back of your office chair. AI-powered background removal tools often struggle with movement, creating a distracting “halo” blur effect around your hair and hands. A physical green screen completely eliminates this digital glitch, delivering a flawless, razor-sharp edge.
Connection Stability: Protecting Your Bandwidth
The most expensive microphone and camera setup will still fail if your internet connection is constantly dropping frames. While wireless internet is incredibly convenient, a wired connection is significantly more stable for high-definition video data transmission.
If your laptop lacks a standard network port, utilizing a simple USB-C to Ethernet adapter allows you to plug a network cable directly into your router, eliminating Wi-Fi lag entirely. If Wi-Fi is your absolute only option, try to position your workstation as close to the home router as possible, or install a compact Wi-Fi extender near your workspace. As a golden rule before any important presentation, always close unnecessary browser tabs and heavy background applications that quietly consume your network bandwidth.
The Step-by-Step Upgrade Hierarchy
If you are building your remote setup from scratch, this is the most efficient and budget-friendly order in which to allocate your funds:
- Audio First: Spend your initial budget on an external USB microphone or quality wired earbuds to guarantee your voice is heard perfectly.
- Lighting Second: Reposition your desk toward natural light or invest in a simple face-level desk lamp.
- Background Third: Focus on tidying, decluttering, and editing your physical space rather than buying new decor.
- Connection Fourth: Secure a cheap ethernet cable and adapter to lock in your signal stability.
Investing in your virtual presentation quality is one of those subtle professional improvements that your clients and colleagues will definitely notice and appreciate long before you do. Take a look at your workspace layout this afternoon, start with a simple microphone adjustment, and watch your digital confidence grow.
About Olivia
Olivia is a remote work and interior styling writer passionate about small-space efficiency, ergonomic home office design, sustainable living habits, and practical decor ideas that help modern professionals build beautiful, productive, and balanced homes.


Comments
Pingback: Productive Home Office in a Shared Apartment: Practical Design Guide